The following instructions are demonstrated using a MacBook. If you are using an iPad, the steps will be the same.
Open the Shared Planner in the OneNote application on your Devices
Step 1: Check your email inbox (including the spam or junk folder because I’m not sure where the email will end up.) to find the share invitation email from “SharePoint Online.” Then click “Open” to access the shared planner files.
Please note:
If the shared folder appears empty, don’t worry. Try using a different browser or opening a private/incognito window, and the files should appear.
If you cannot find the email, please consult with your IT colleague to see if the sender’s email address has been blocked.
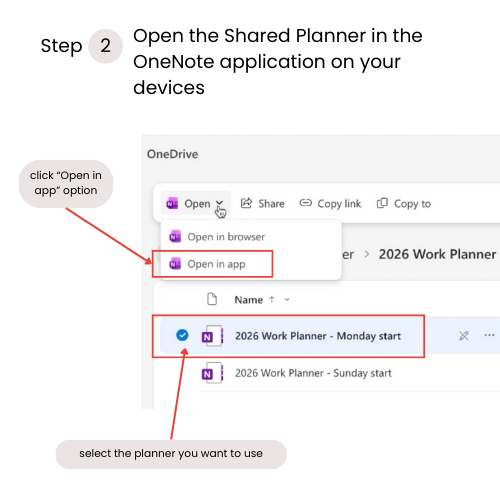
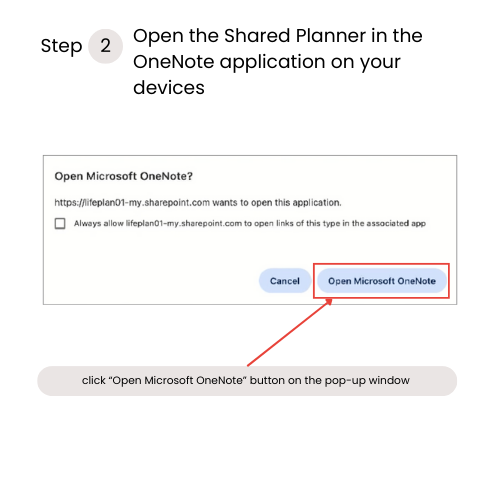
Step 2: Select the planner file from the shared folder. Then, click the “Open” button and choose the “Open in app” option to open the shared planner in the OneNote application on your devices.
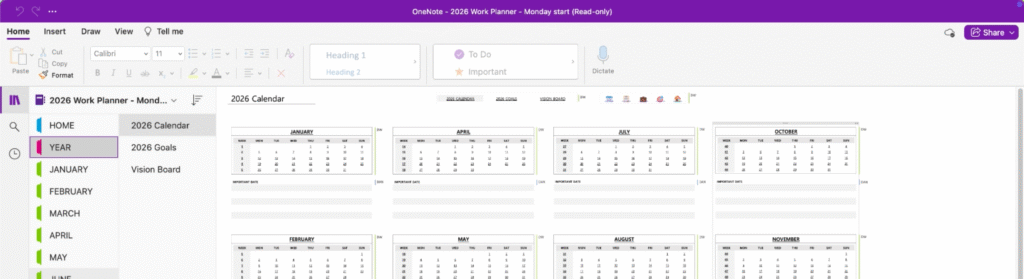
* The Shared Planner is in “READ-ONLY” mode, as indicated at the top of the OneNote application.
Copy the OneNote Planner
IMPORTANT !!!
Before you copy the planner, please read these carefully:
In order to make all hyperlinks work correctly, make sure you copy all pages in the same order / section with the shareable planner and DO NOT delete any pages!
Please DO NOT click the hyperlinks before you copy all pages! If you do that before all the copies are done, you might find it will link to the shareable planner!
DON’T forget to close the shareable planner when it is all done. Then you will find all hyperlinks work perfectly on your new planner.
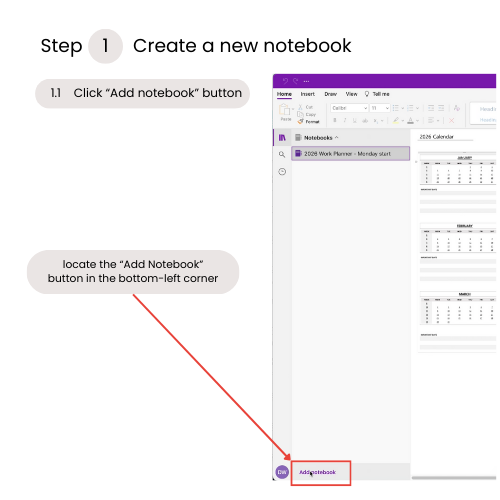
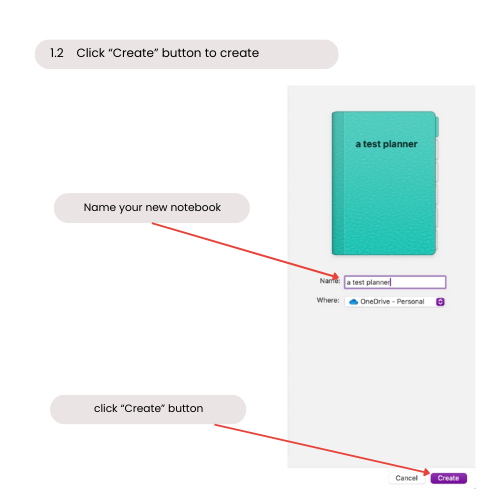
Step 1: Click the “Add notebook” button to create a NEW notebook.
Step 2: Copy the sections from the shared planner to the new notebook.
Now, back to the shared planner, right-click the section, then click the “Copy” button. (Please copy the section ONE BY ONE. In my experience, selecting multiple sections at once, the copy progress may not be successful.)
Choose the new notebook from the pop-up window. Wait for the copy process to finish.
Then you can REPEAT THESE STEPS until you copy all sections from the shared planner.
Hello!
I'm Dan
A digital planner creator. Using digital planners has been a game-changer for my life and work. Now, I am creating effective digital planners and organizational tools to help you make your life and work more efficient.