This import instruction video is for users with a Microsoft PERSONAL account who are using the OneNote planner on a MacBook.
The following instructions are demonstrated using a MacBook.
Download the .zip file of the OneNote Planner
Step 1: Find the OneNote planner download link in the user guide file. Simply click it to access the planner files stored on OneDrive.
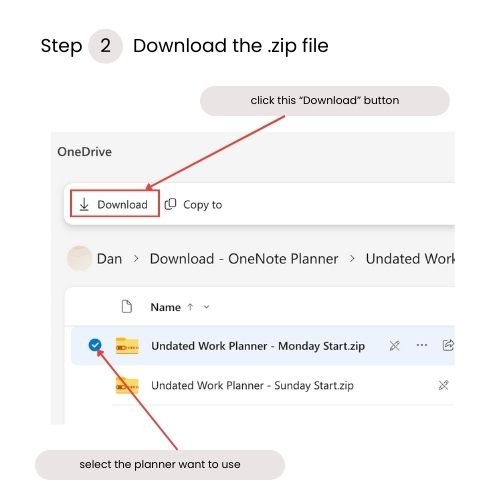
Step 2: Select the planner you want to use, then click the “Download” button in the upper-left corner to save the planner file to a local location on your MacBook.
Please note:
You don’t need a Microsoft account to download the files directly from OneDrive.
DO NOT unzip the planner file until you download it to the local.
Import the OneNote Planner
Step 1: Locate the downloaded .zip file, double-click to unzip it.
*After you unzip the planner, all these files should be in ONE Folder.
Step 2: Copy or move the entire unzipped folder to the Backup Folder.
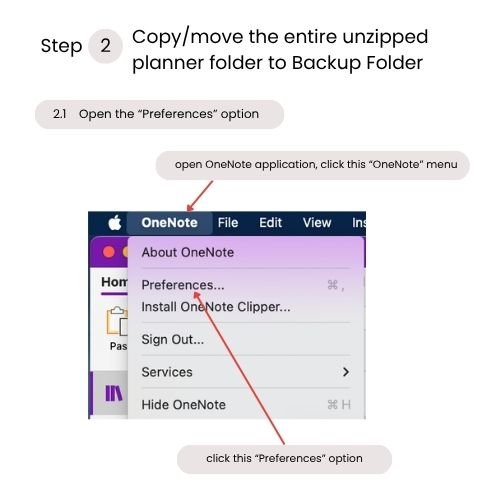
Open the OneNote application, then open the “Preferences” option.
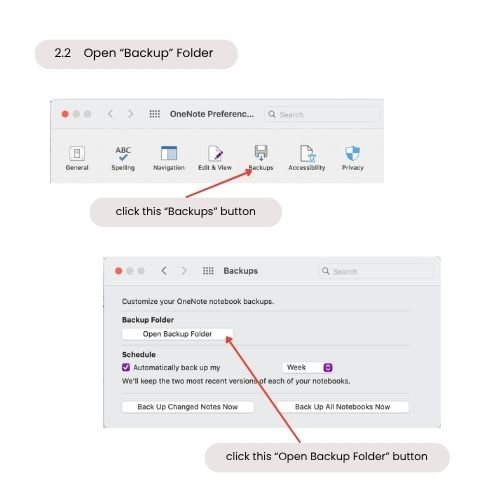
Click the “Backups” button and open Backup Folder.
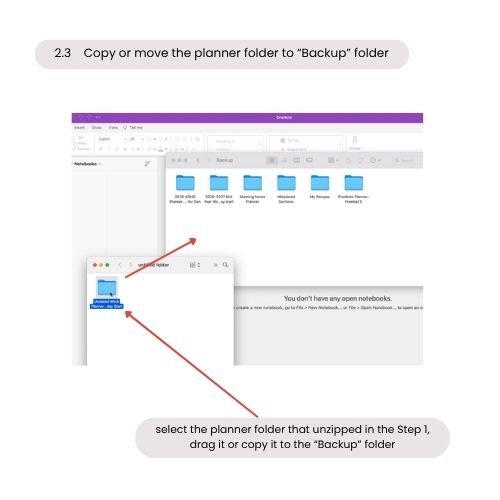
Copy or move the unzipped file (from Step 1) to the Backup folder.
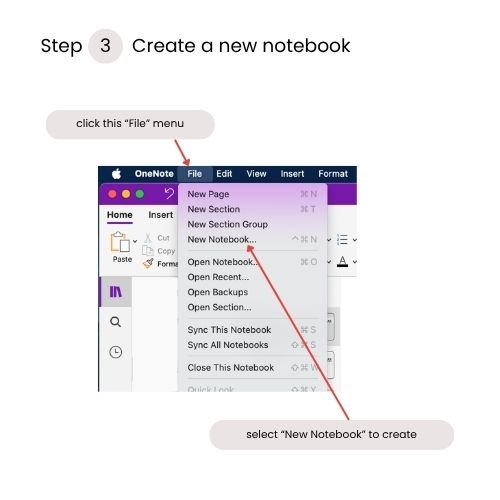
Step 3: Create a new notebook in OneNote.
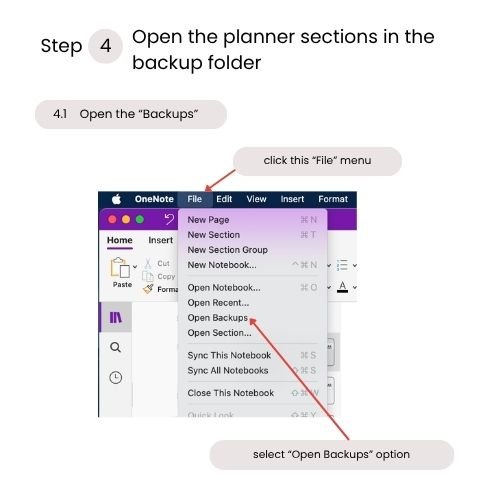
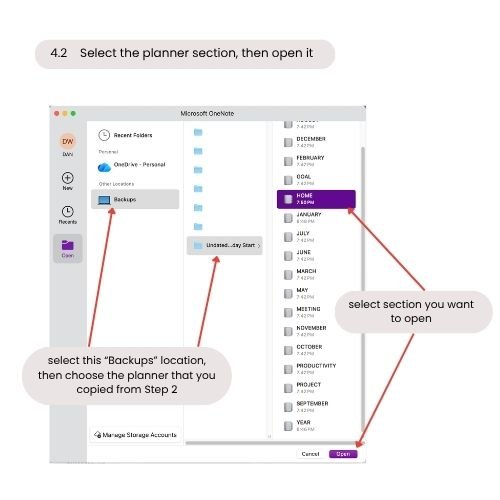
Step 4: Open the planner sections in the backup folder.
* Please note, all open sections are “Read-Only”.
IMPORTANT !!!
Before you copy the planner, please read these carefully:
To ensure all hyperlinks work correctly, when you copy the planner page, make sure thenew notebook section name is the SAME AS the corresponding planner section name in the backup folder.Also, DO NOT delete any pages!
The backup planner sections canNOT BE COPIED directly, you can ONLY COPY PAGES.
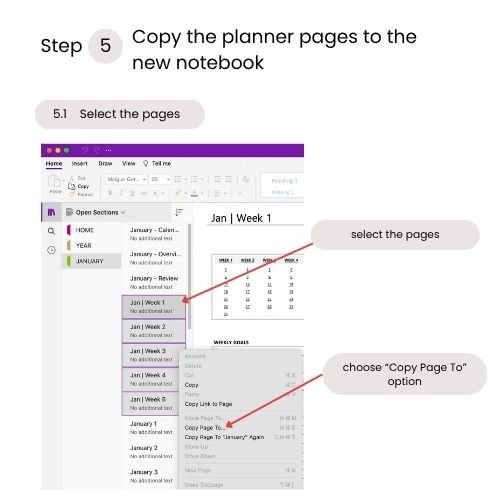
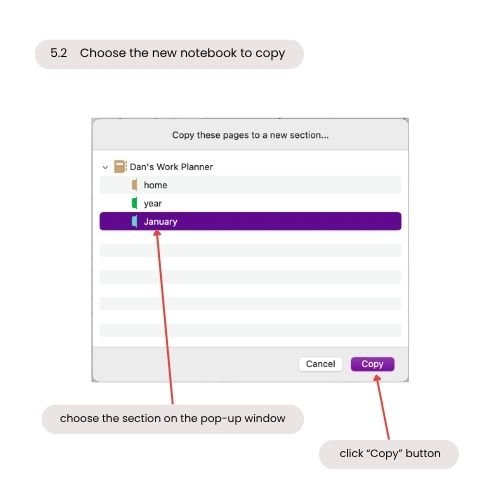
Step 5: Copy the planner pages to the new notebook created in Step 3.
Select the pages, right-click them, then choose the “Copy Page To” option. (Please copy a few pages at a time. In my experience, when selecting too many pages at once, the copy process may not be successful.)
Choose the section of the new notebook from the pop-up window. Wait for the copy process to finish.
Then you can REPEAT THESE STEPS until you copy all sections and pages from the planner.
Hello!
I'm Dan
A digital planner creator. Using digital planners has been a game-changer for my life and work. Now, I am creating effective digital planners and organizational tools to help you make your life and work more efficient.