Troubleshooting

for OneNote Planner

Importing Planner

Because Microsoft recently changed how its cloud storage system works, the OneNote Notebook Importer no longer exists. Therefore, Mac users need to manually import the OneNote planner.

Don’t worry, just change to another browser or use the private window or incognito window of the browser to try again. Then the planner files should show up.

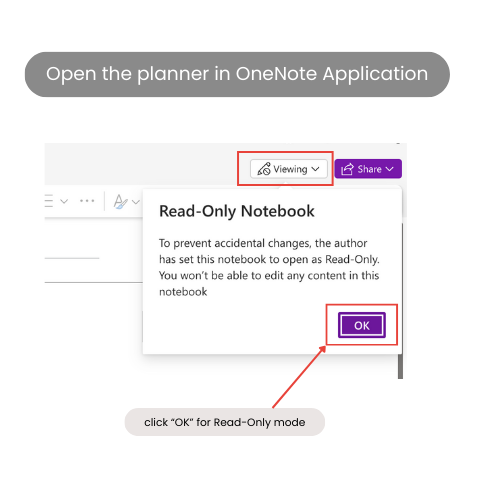
Don’t worry; when you click the “Viewing” button on the online planner, you might see a “Read-Only” pop-up warning. Just click “OK”.

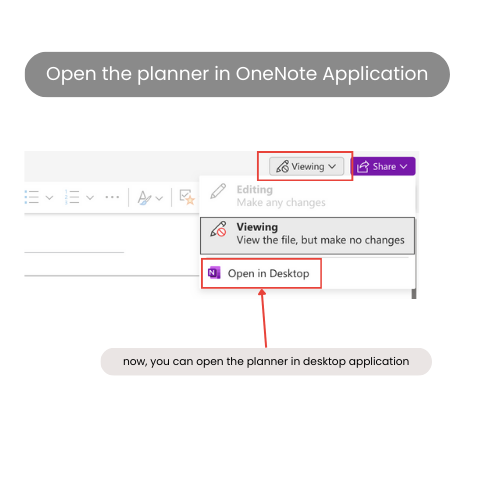
Then click “Viewing” again, and you will find the option to open the planner in desktop.

Using Planner

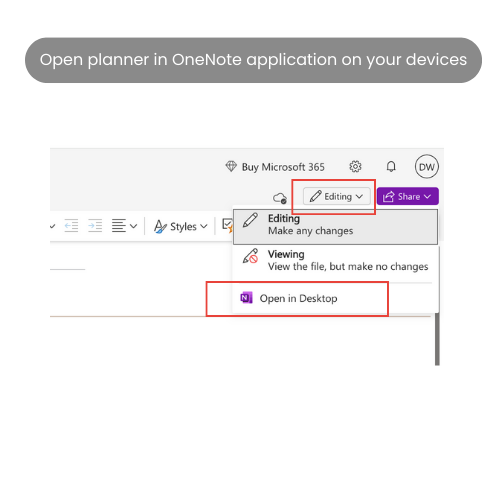
Yes, you can use this planner on multiple devices by installing the OneNote application and signing into the same Microsoft account. Once you sign in, your planner will sync automatically across all your devices.

Click HERE to download the OneNote application.

Click HERE to learn how to use the planner on multiple devices.

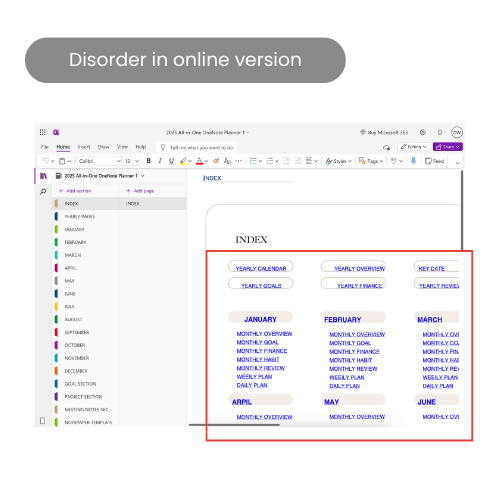
Don’t worry, due to the feature limitations of the online and other versions. When you open the planner in the OneNote application on your devices, it will be fixed automatically.

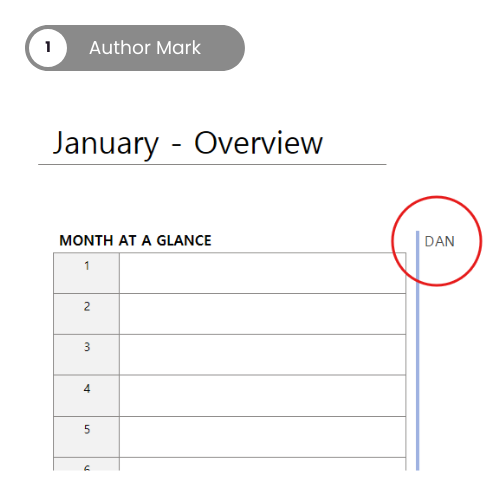
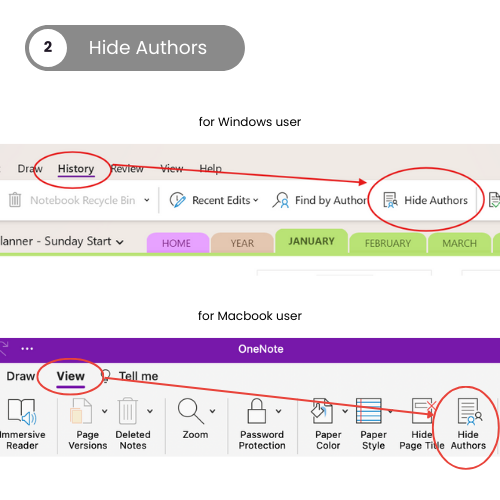
According to OneNote, author marks cannot be removed or deleted, but you can hide them.

  • For Windows users – Click on “History” and then select “Hide Authors” to make the marks disappear.
  • For Macbook users – Click on “View” and select “Hide Authors“.

No, OneNote does not offer a direct feature to customize multiple pages simultaneously. You can only modify them one by one.

According to Microsoft, the “Shading” option is currently NOT available in OneNote on iPad. As of now, that feature is only accessible on the desktop version of OneNote.
This can be a bit frustrating if you’re working on the go or prefer using your iPad. Unfortunately, there’s no workaround on the iPad app itself.

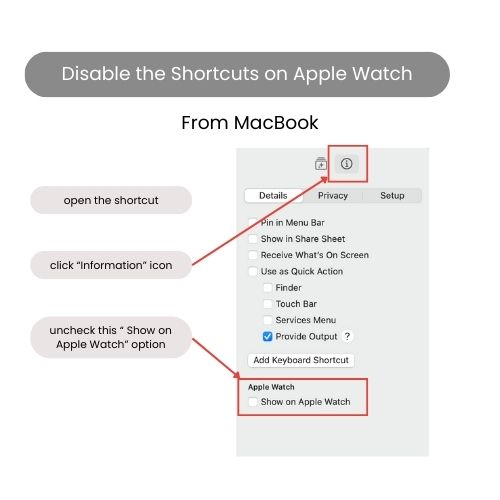
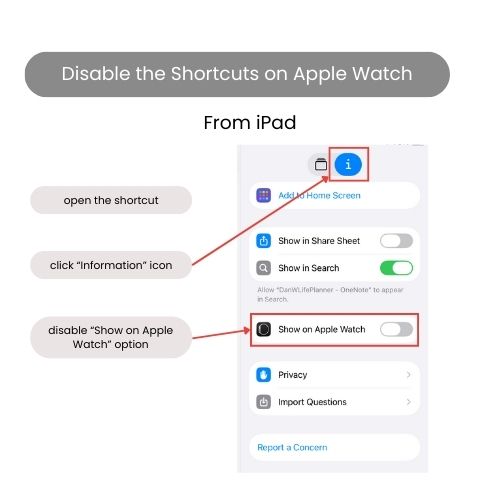
Yes, you can disable this option. 

  • For MacBook users – Open the Shortcut, then click on “Information” icon, uncheck this “Show on Apple Watch” option.
  • For iPad users – Open the Shortcut, then click on “Information” icon, disable this “Show on Apple Watch” option.